> For the complete documentation index, see [llms.txt](https://docs.world-creator.com/llms.txt). Markdown versions of documentation pages are available by appending `.md` to page URLs; this page is available as [Markdown](https://docs.world-creator.com/zh/cao-zuo-zhi-nan/save-and-export/export-to-blender.md).
# 导出到 Blender
虽然你可以手动导出地形,但我们将使用更简单的方式 —— Blender 的 World Creator 桥接。这将把导出工作流程简化为两个按键,并且地形已在 Blender 中为你妥善设置。
{% hint style="info" %}
有关 Blender 桥接及如何安装桥接的完整概述,请参阅 [Blender 桥接文章](/zh/can-kao/export/bridge-tools/blender-bridge.md)。桥接也适用于大多数其他流行的 3D 程序。有关完整列表,请参阅 [桥接参考](/zh/can-kao/export/bridge-tools.md).
{% endhint %}
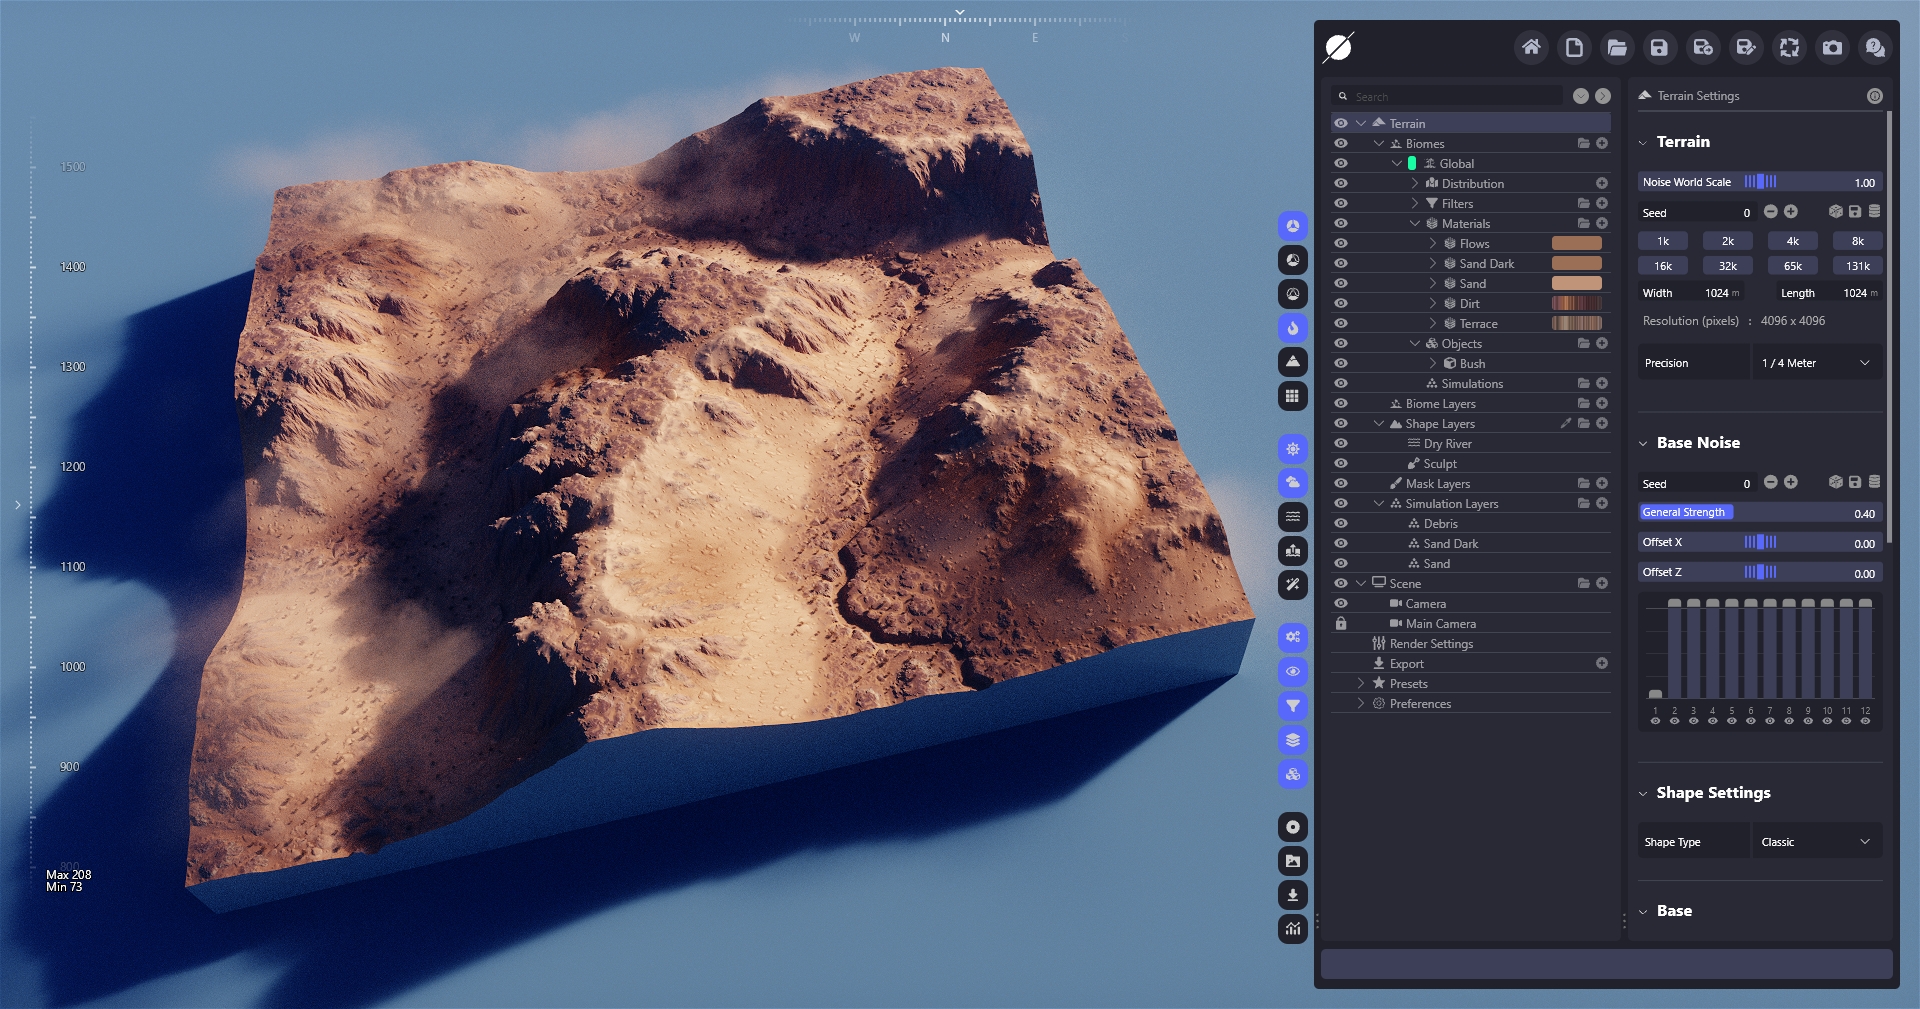
在 Blender 中安装桥接后,我们要做的就是按下 **同步** 按钮,位于 World Creator 的右上角。这将导出地形以及材质和所有其他相关信息。
同步按钮
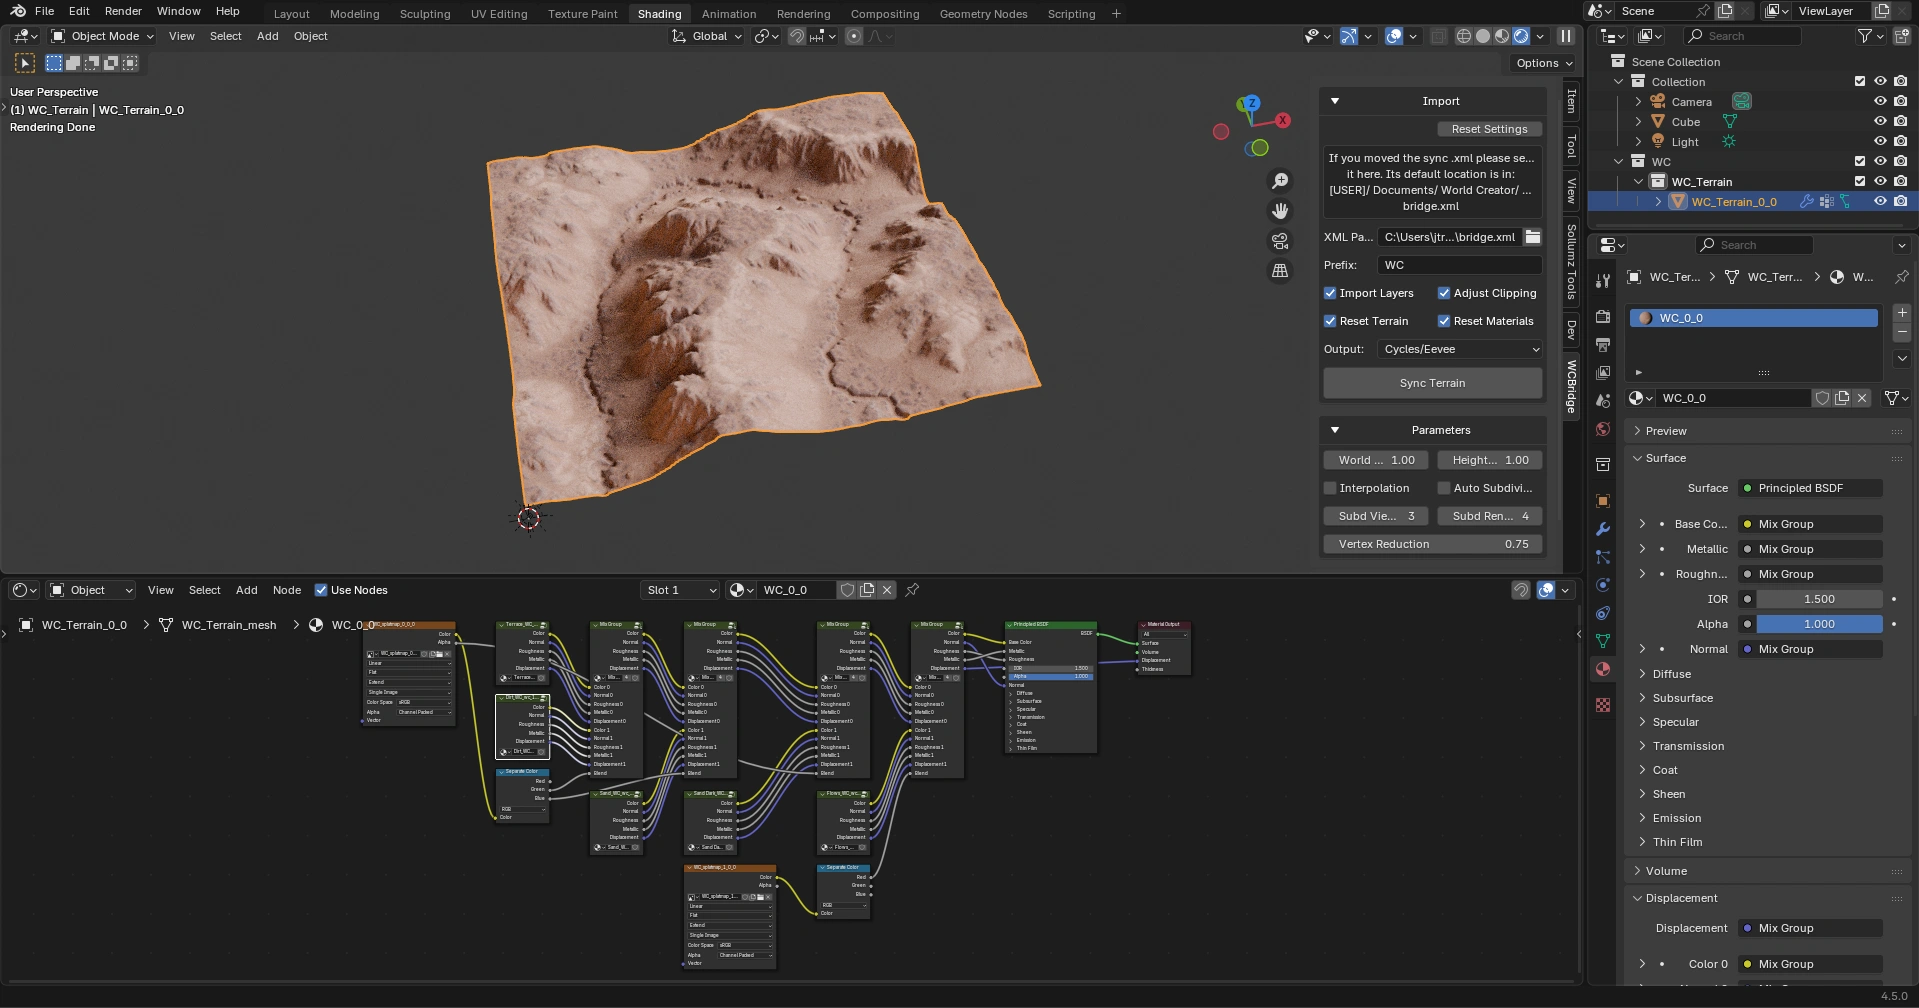
现在我们要将其导入到 Blender 中,只需按下 **同步** 桥接界面中的按钮。如果你想使用完整的分层材质设置,请确保启用 **Import Layers**。这会以类似于 World Creator 中分层材质的方式构建材质图,并允许你使用平铺纹理而不是一个巨大的烘焙颜色贴图,这对于背景地形更实用且性能更好。
分层导入到 Blender
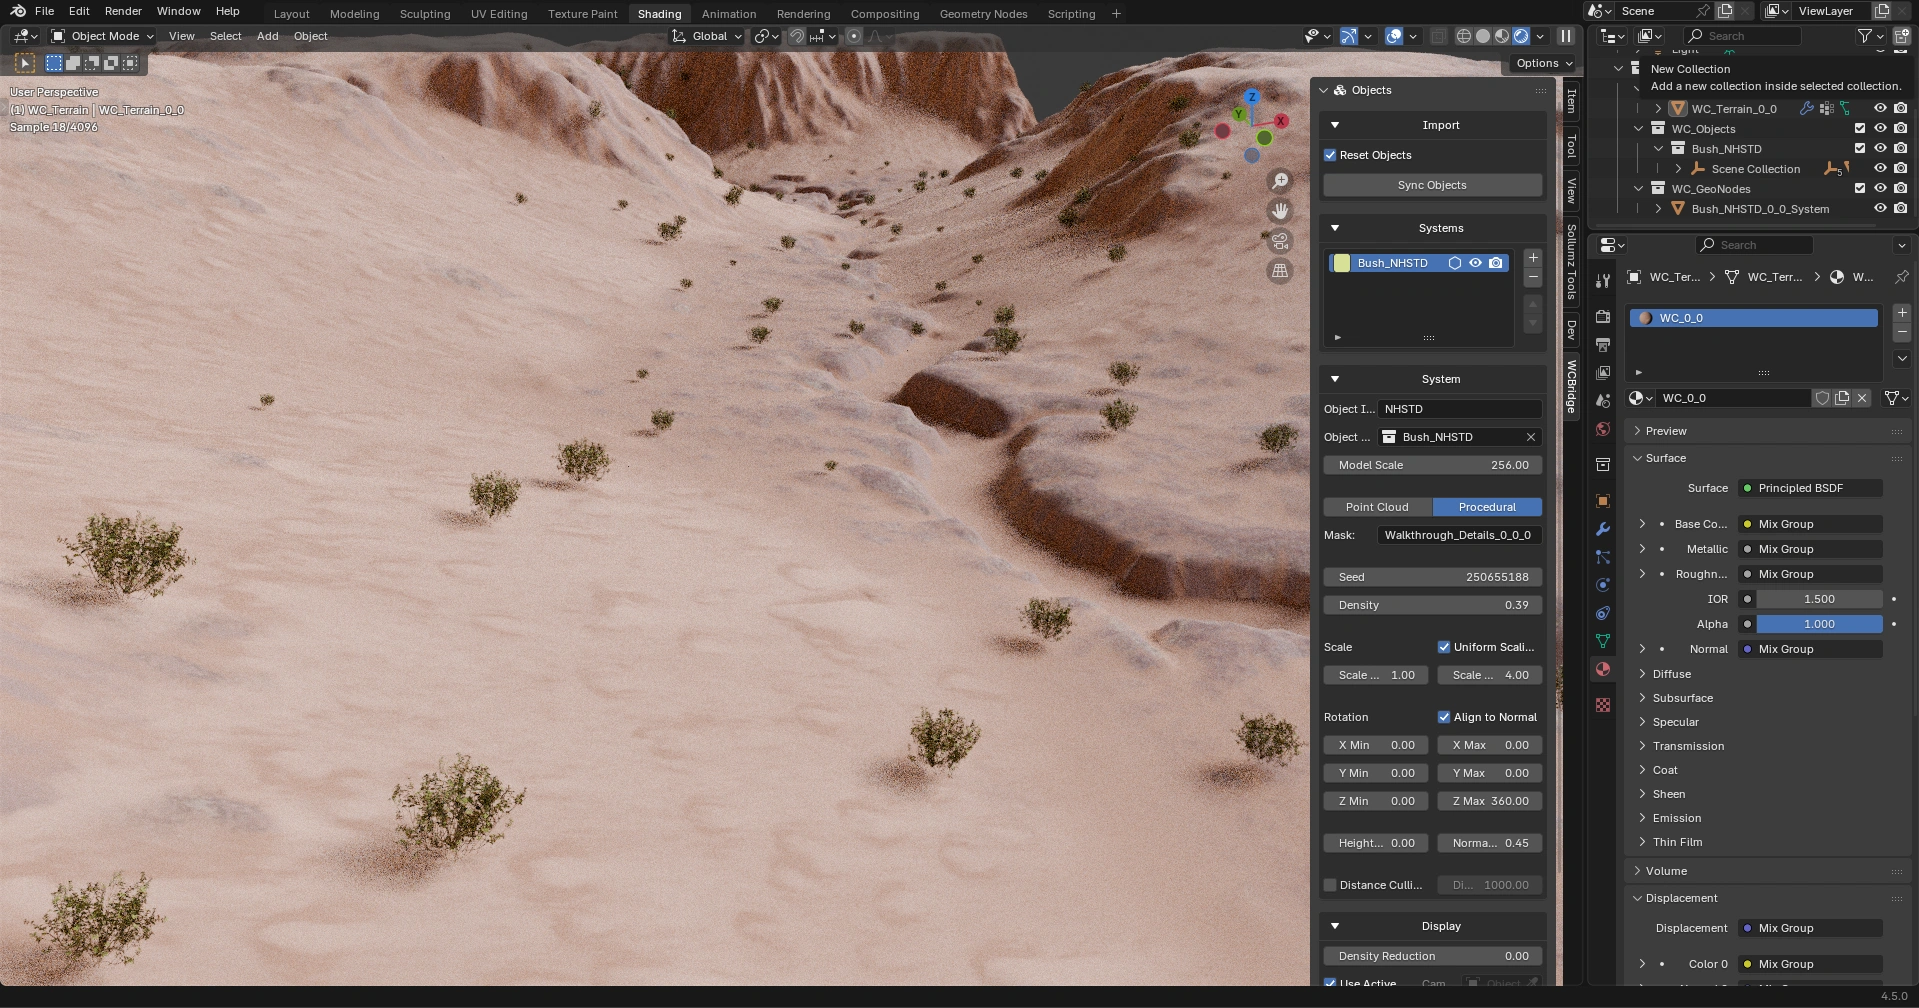
导入地形后,我们现在还想把分布的灌木带入 Blender。为此我们打开 **Objects** 面板并选择 **同步对象**。这随后会创建一个几何节点系统,根据我们的 WC 分布自动散布灌木。现在剩下要做的就是禁用 **视锥裁剪** 在 **显示** 选项下的 **距离剔除** 系统。这两项默认启用,以优化较大和更密集场景的性能。有关桥接的更多信息,请参阅 [Blender 桥接参考](/zh/can-kao/export/bridge-tools/blender-bridge.md).
---
# Agent Instructions
This documentation is published with GitBook. GitBook is the documentation platform designed so that both humans and AI agents can read, navigate, and reason over technical content effectively. Learn more at gitbook.com.
## Querying This Documentation
If you need additional information that is not directly available in this page, you can query the documentation by asking a question.
Perform an HTTP GET request on the following URL with the `ask` and `goal` query parameters:
```
GET https://docs.world-creator.com/zh/cao-zuo-zhi-nan/save-and-export/export-to-blender.md?ask=&goal=
```
`ask` is the immediate question: it should be specific, self-contained, and written in natural language.
`goal` is what the user is ultimately trying to achieve, the reason they need the answer. Sharing it helps GitBook give you a better, more relevant answer. A goal is most helpful when it describes the outcome the user wants rather than restating the question. For example, with `ask=how do I create an API token`, a goal like `automate deployments from our CI pipeline` lets GitBook tailor the answer to that use case.
The response will contain a direct answer to the question and relevant excerpts and sources from the documentation.
Use this mechanism when the answer is not explicitly present in the current page, you need clarification or additional context, or you want to retrieve related documentation sections.